Preparation
Preparing your tack work is very important because it can affect the quality of the final weld. There are three essential points to check in the preparation process. These are:
Preparing your tack work is very important because it can affect the quality of the final weld. There are three essential points to check in the preparation process. These are:
- Clean metal
Metal must be cleaned before tacking can take place. Contaminants like grease, dirt, paint and rust must be removed from the weld joint and the immediate area, to produce a good quality tack.
It is very important for the metal to be clean because contaminated tack welds will introduce weld defects. The filler wire and tungsten must be clean as well. You can read more about pre-weld cleaning here.
- Correct amperage setting
Most times a higher amperage is used for tack welding than for the main weld.
When tacking carbon -or stainless steel, you can increase the amperage by about 20% compared to the amperage you will be using for your weld.
For tacking aluminium, you can turn up the amperage to about 30% higher than the amperage you will be welding with.
If you were to tack with the same amperage as you would when welding, it would take longer for the puddle to form, and you’ll also put more heat into the workpiece than necessary. This would make it more susceptible to warping. It also gets more uncomfortable to hold as it gets warmer on your hands.
If you turn up the amperage too high or even double it, the metal melts very quickly. You may be happy with the result, but we do not recommend this. Apart from the fact that it can lead to a blowout, there’s another important reason why you should not put too much heat in at once.
For instance, right next to the tack, in the so-called heat-affected zone, small invisible cracks can form in the base metal if you suddenly put in a massive amount of heat. The metal becomes brittle, and the cracks can grow over time, especially when put under stress.
Although this might not always lead to structural failure, it is not worth the risk, so it is best to avoid this.
- Proper fit-up
To maintain the desired alignment between the pieces of metal being joined, the workpiece needs to be held in place by using clamps or by holding it wearing gloves.
When tacking aluminium, it is important that there’s no gap in the joint where you want to place your tack weld, otherwise, you’ll just burn through the metal.
Tack Placement and Tack Sequence
Once everything is set up, you must decide where you’re going to place the tacks and in what order. It is very important to place the tacks strategically, to reduce the pulling and warping of the metal.
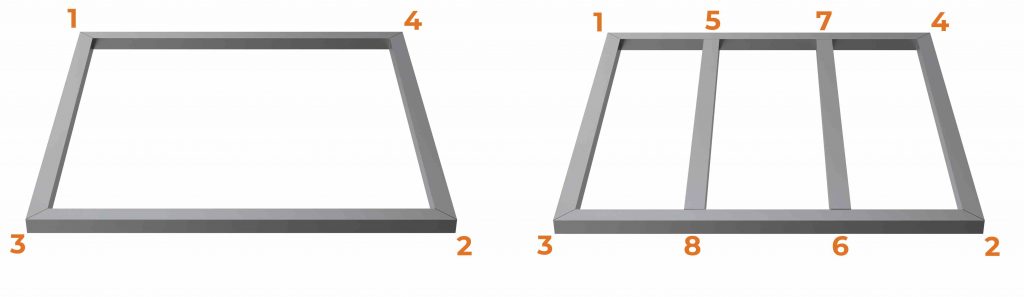
In figure 3 you can see a tack sequence you can use with frames. You basically jump from opposite corners, back and forth, until everything is tacked in.
If you have a square butt joint and you place the tack welds progressively from one end to the other, shrinkage can close the gap at the opposite end and can cause the sheet ends to overlap (figure 4).
One way to avoid this is to first tack the joint ends, then place a tack in the middle, and then add tacks right in the middle of those that are already done, alternating in both directions.
The distance between the tacks depends on the type of metal, the length and thickness of it, as well as the complexity of the weld.
On stainless steel, the distance between tacks should be shorter compared to carbon steel or aluminium, because stainless steel has a greater thermal expansion.
You will also need more tacks on thinner material to keep the joint fixed while welding. Because thinner material is more susceptible to warping.
Should I be tacking with or without filler metal?
In general, there are two different tack welds:
- A fusion tack, a tack without filler metal
- A tack made with filler metal.

Figure 5: Two tack welds on stainless steel. One made without filler metal (left) and one with filler metal (right).
You can fuse tack two metal parts together, even if the part is bevelled. This can be done only if you have a proper fit-up with no gap between the edges.
Fusion tacks are useful for when you first need to place your metal into position, so that it can just hold its own weight. It is often done when it’s difficult to use clamps to hold the workpiece and you prefer to hold it yourself, leaving you with only one hand left to tack weld.
Are the fusion tacks strong enough to keep the metal parts together?
Depending on the type of metal and construction, fusion tacks are not always strong enough to keep the metal parts properly together. Sometimes, even if they are, the least bit of stress can cause them to break. So, once you’ve got everything in place and the piece is holding its own weight, you should strengthen them with filler metal, and make the first tacks a bit bigger using filler metal if you did not use any.
When tacking stainless steel, it’s not always necessary to use filler metal, because it fuses quite well without. Fusion tacks on stainless steel are often strong enough. Not having to use any filler metal will save you time because you can tack much faster.
If you tack weld aluminium without using filler metal, your tack can crack quite easily. Welding over a tack that is cracked will introduce weld defects (figure 6). Another problem when tacking aluminium without filler metal, is that you’re probably just fusing the top layer of the metal together, without any penetration (figure 7).

Figure 6: cracked aluminium tack
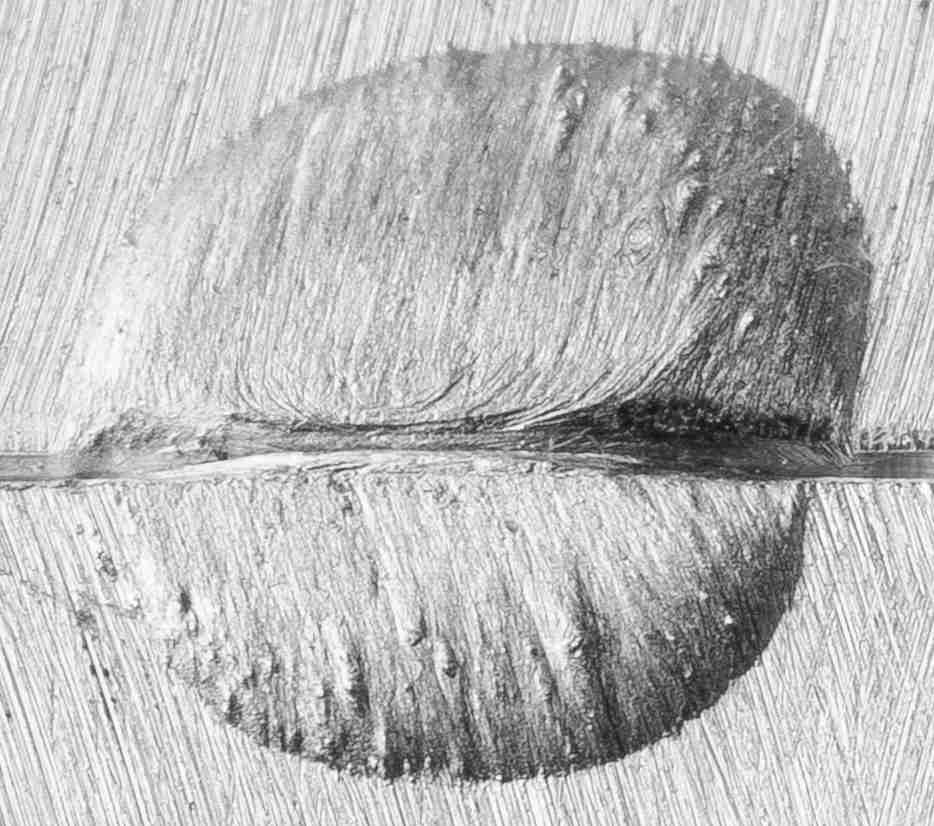
Figure 7: Incomplete joint penetration (aluminium): failure of filler metal or base metal to reach the root of the (tack) weld.
Does a tack weld require full penetration?
Regardless of the type of metal, if the joint requires full penetration, the tack weld requires full penetration as well.
If you need full penetration of your tack (weld) on stainless steel, be sure to use some type of weld backing like a backing bar or a purge block, to prevent the ‘cauliflower’ effect on the inner tack weld surface (figure 8).
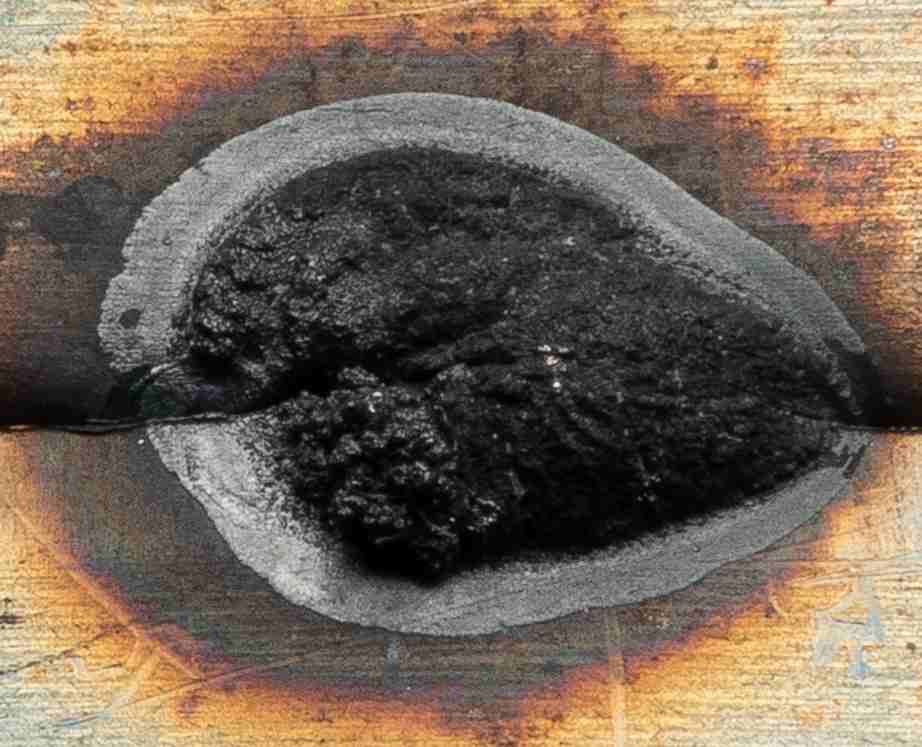
Figure 8: ‘cauliflower’ effect due to oxide formation on the inner tack weld surface.
In general, tacks made with filler metal are much stronger. The same type of filler metal for tack welding should be used for the main welding procedure. Sometimes a smaller diameter filler rod is recommended than for the weld because it will keep the wire from balling (figure 9).
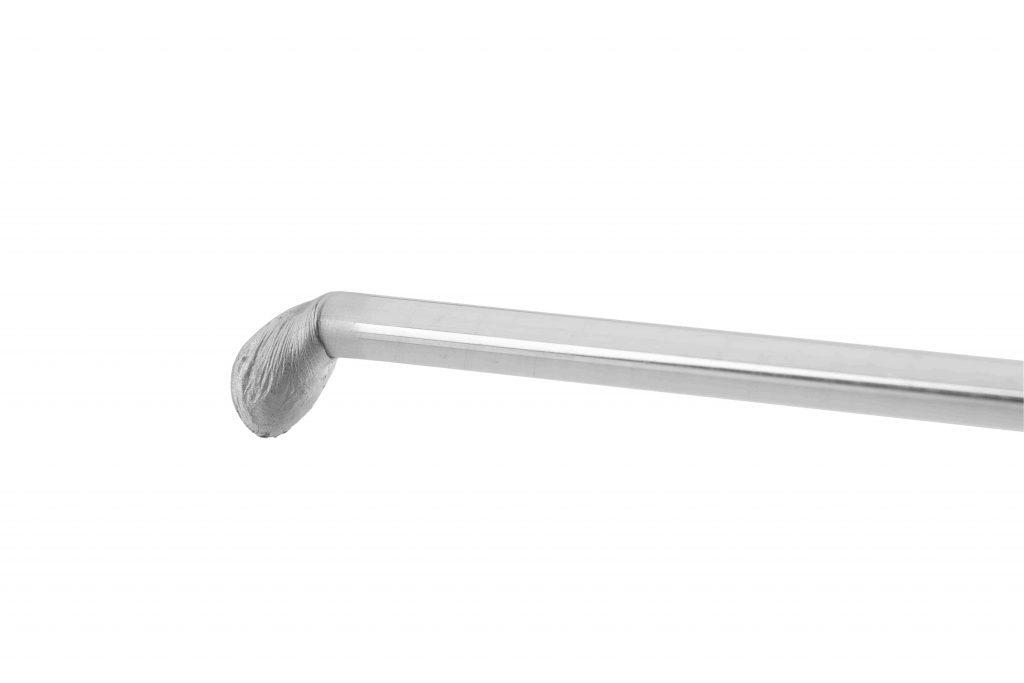
Figure 9: balled filler metal. To prevent balled filler wire, use a smaller diameter filler rod.
The right way to tack weld
We have listed 4 steps to correctly tack up your work.
Please remember that tack welding requires the same precautions as the actual welding process.
- Torch position
When you place a tack, you should hold the tip of the tungsten a few millimetres above the joint, oriented halfway between the two metal parts. If one side is thicker than the other, the heat of the arc should be concentrated on that part, so that the heat will be balanced out in both parts (figure 10).

Figure 10 : torch position for placing tack between equally sized metal plates (left) and unequally sized plates (right).
- Warming up the metal
- Adding filler metal
- Cooling down the metal
Whilst you keep the torch in position, press the torch button or foot pedal until the metal warms up and begins to melt. A puddle of liquid metal will form. If one of the sides of the metal liquefies into a puddle before the other, you need to move the torch more towards the other side, so that the puddle is generated between both parts of the metal.Then you can quickly dab the filler metal in and out of the weld pool. You may repeat this once or twice. If you add too much filler metal, it will steal heat from the puddle, and the base metal will not become hot enough. This will leave you with an improperly fused tack.When the metal is merged well together, it’s time for the tack to solidify by turning off the amperage. To protect the cooling tack, leave the gas cup a little longer position after the tack has solidified, so that the shielding gas can flow a few seconds longer. When the tack is placed, be sure to check if you can see any defects like discolouration from contamination, craters, or cracks. The tack should be smaller than the final weld will be. There’s no real definition of the size or length of a tack weld, however, it should be relatively small-sized. The tacks on aluminium are allowed to be larger compared to tacks of steel, but the tacks are not meant to be visible after final welding, so the final weld should be placed over the tack welds within the joint. When you carry on with tacking the rest of your work, don’t forget to check the workpiece after the first few tacks to make sure everything is still in place. Once everything is correctly tacked up, you can place your final weld. Conclusion It’s safe to say tack welding is pretty important. Not only to hold metal in the proper position, but also to ensure the quality of the final weld. To correctly tack up your work, it is essential to follow the 4 steps listed below.
- Do your prep work. Make sure that the metal you want to weld, the tungsten and the filler metal is clean; you must use the correct settings on your welder and have a proper fit-up.
- Place your tack welds strategically. What it comes down to is that wherever you place a tack, place one exactly opposite to that. Your tack sequence is very important to control distortion.
- Use filler metal where possible, because it makes your tack much stronger (except on stainless steel where fusion tacks are often strong enough).
- Check your tack. Make sure that:
- Your tack is merged well on both sides and smaller than the main weld will be.
- It does not contain any type of defects like contamination, cracks, or craters, because then the tack becomes the weakest point of your weld.
- If the joint requires full penetration, the tack weld requires full penetration. And don’t forget to use weld backing on stainless steel.
If you want to know more you can also check out our video about tack welding on YouTube, or download the TIG troubleshooting guide of tack welding
One Response
Correct.